
Building water filters at home gives students hands-on experience with real engineering challenges. These projects use everyday materials like sand, gravel, and coffee filters to clean dirty water.
Homemade water filter experiments teach students problem-solving skills, teamwork, and creativity. They blend physics, chemistry, and engineering in one activity.
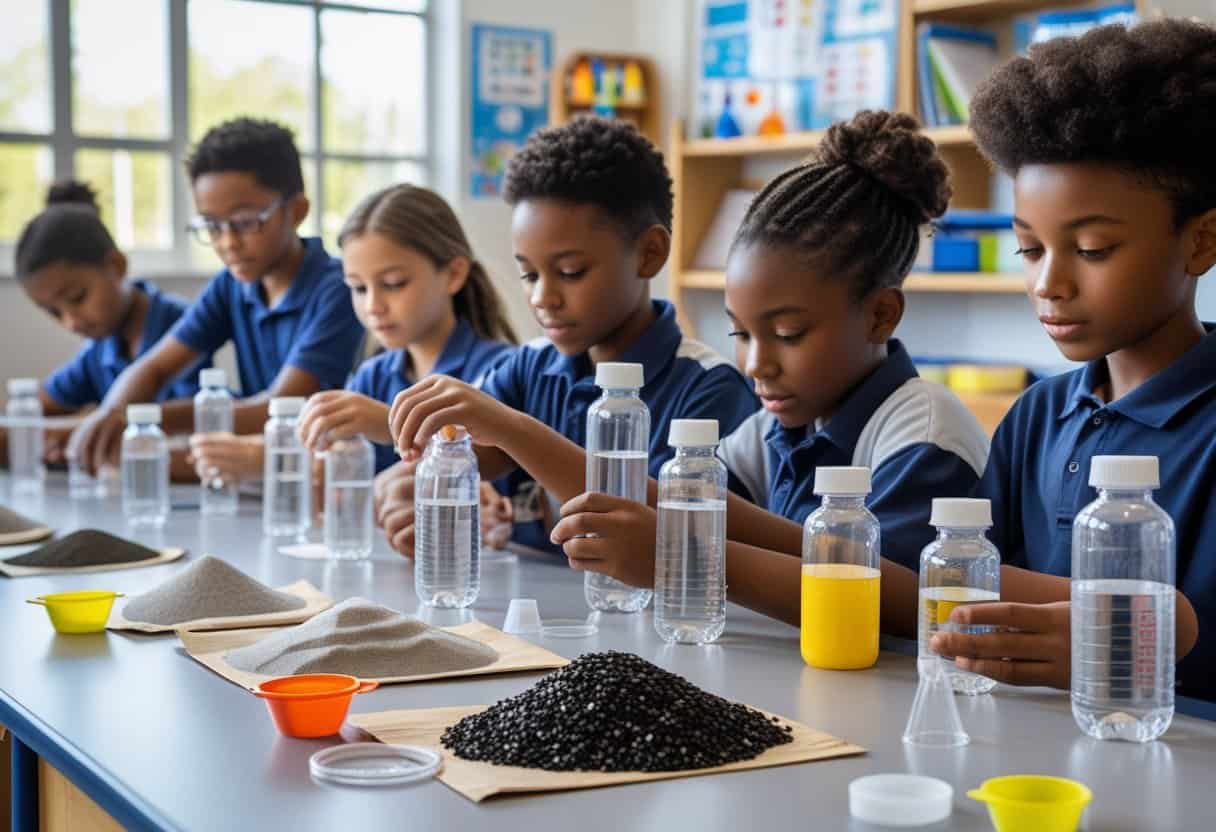
Young learners find out how water filtration systems work by watching and testing. They get to see contaminated water become cleaner as it moves through different filter layers.
This process mimics real water treatment methods used worldwide. The project connects classroom learning to real-world problems that affect millions of people globally.
Students learn about environmental science and sustainability. They also build critical thinking skills for the future.
The experience shows them how science and engineering can solve challenges in their own communities. It’s honestly pretty cool to see that connection click for kids.
Why Homemade Water Filters Are Essential for Young Learners
These simple projects mix hands-on learning with real-world applications. They teach basic scientific principles and help kids see how engineering can solve problems.
Kids build confidence by trying, failing, and trying again. It’s not just about water—it’s about learning how to learn.
Promoting Scientific Curiosity and Inquiry
Building water filtration systems makes students curious about how water moves through different materials. They wonder why some layers work better or what happens if they mix up the order.
This curiosity leads to deeper learning. Kids start testing different combinations of sand, gravel, and cotton.
They measure how fast water flows through each setup. The process teaches them to observe closely.
They notice which filters make water clearer. They see how different materials trap dirt and particles.
Key observation skills students develop:
- Comparing before and after results
- Measuring flow rates
- Recording water clarity changes
- Testing multiple variables
Students learn that science involves asking good questions. Sometimes one experiment leads to a dozen new ideas to try.
Developing Engineering and Problem-Solving Skills
Homemade water filter experiments teach kids to break big problems into smaller pieces. They have to figure out which materials work best for cleaning water.
Students decide how to layer these materials. The building process takes planning and a bit of patience.
They learn to gather all their supplies before starting. And, honestly, sometimes they forget something and have to improvise.
When a filter doesn’t work well, students need to find solutions. Maybe the water flows too fast, or it stays dirty.
They adjust their designs and try again. It’s a cycle of testing and tweaking.
Problem-solving steps students practice:
- Identify what isn’t working
- Think of possible fixes
- Test one change at a time
- Check if the fix worked
These skills help in other subjects too. You’d be surprised how much better they get at tackling math and science challenges.
Fostering Environmental Awareness
Water filtration projects show why clean water matters for health. Kids see how dirty water can harm people and animals.
They learn that many places in the world lack safe drinking water. Students also discover that nature has its own filtering systems.
Rivers flow through rocks and sand that clean the water. Wetlands filter pollution before it reaches lakes.
These experiments help kids understand pollution problems. They see how tough it is to remove certain dirt and chemicals.
Environmental connections students make:
- How human activities affect water quality
- Why protecting water sources matters
- How technology can help solve environmental problems
- The importance of clean water for all living things
These lessons often inspire students to care more about protecting the environment. They start thinking about how their actions impact water quality in their community.
Top Materials and Kits for Building Homemade Water Filters (Buy from Amazon)
Looking to get started or just need supplies? Here are some great options you can find on Amazon. These kits and materials align perfectly with homemade water filter projects for students:
- Activated Charcoal Pellets
- Fine Aquarium Sand
- Gravel for Science Projects
- Cotton Filter Pads
- Plastic Bottles for DIY Projects
- Science Experiment Kits for Kids
- Coffee Filters Bulk Pack
- Lab Safety Goggles
- pH Test Strips
- Measuring Cups and Beakers Set
Having the right materials on hand makes the whole process smoother—and more fun. Plus, you don’t have to hunt all over town for supplies.
Understanding the Science: How Homemade Water Filters Work
Water filters use basic scientific principles to remove dirt, particles, and other unwanted stuff from dirty water. The process combines physical barriers, chemical reactions, and different materials working together to transform contaminated water into something much cleaner.
The Filtration Process Explained
Water filters work through three main processes to clean dirty water. Physical filtration acts like a barrier that blocks large particles from passing through.
Chemical processes help remove smaller contaminants that physical barriers can’t catch. The first step is sedimentation—heavy particles sink to the bottom when water sits still.
This removes dirt, sand, and dense materials before water moves through the filter layers. Adsorption happens when activated carbon grabs onto chemicals and odors, kind of like a magnet.
The carbon removes chlorine, bad tastes, and some harmful chemicals. Physical straining occurs as water passes through different-sized materials.
Large rocks catch big debris first. Sand traps smaller particles. Cloth or coffee filters snag the tiniest bits that other layers miss.
Students can see all this in action when building homemade water filters with common materials. Each layer serves a specific purpose in the process.
Role of Different Filter Materials
Different materials in a homemade water filter each have a job. Each layer removes different contaminants based on size and properties.
Gravel and large rocks go at the bottom. They catch big pieces like leaves and twigs and help water flow evenly.
Sand forms the main filter layer. Fine sand particles trap smaller dirt and debris that slip through the gravel.
Coarse sand usually works better than fine sand for homemade filters. Activated carbon removes chemicals, bad smells, and tastes from water.
This material has tiny pores that grab unwanted substances. Students can use crushed charcoal as a substitute.
Cloth or coffee filters catch the smallest particles. These make the final barrier before water exits the filter.
The order of materials matters. Water should flow from largest to smallest materials for the best results.
Comparing Homemade and Commercial Water Filters
Homemade and commercial water filters use similar basic ideas but differ in effectiveness and complexity. Both types use physical barriers and filtration materials.
Commercial filters use advanced materials and precise engineering. They remove bacteria, viruses, and chemicals that homemade versions can’t touch.
Professional filters last longer and process water faster. Homemade water filters work well for removing visible dirt and some odors, but not for dangerous microorganisms or toxic chemicals.
These filters are best for learning, not for actual water purification. Key differences include:
- Filtration precision: Commercial filters remove particles measured in microns
- Chemical removal: Professional systems target specific contaminants
- Safety standards: Commercial products meet strict health regulations
- Durability: Store-bought filters last months or years with proper care
Students learn a lot from both. Homemade projects teach basic concepts, while commercial examples show off advanced solutions.
Key Materials Used in Homemade Water Filters
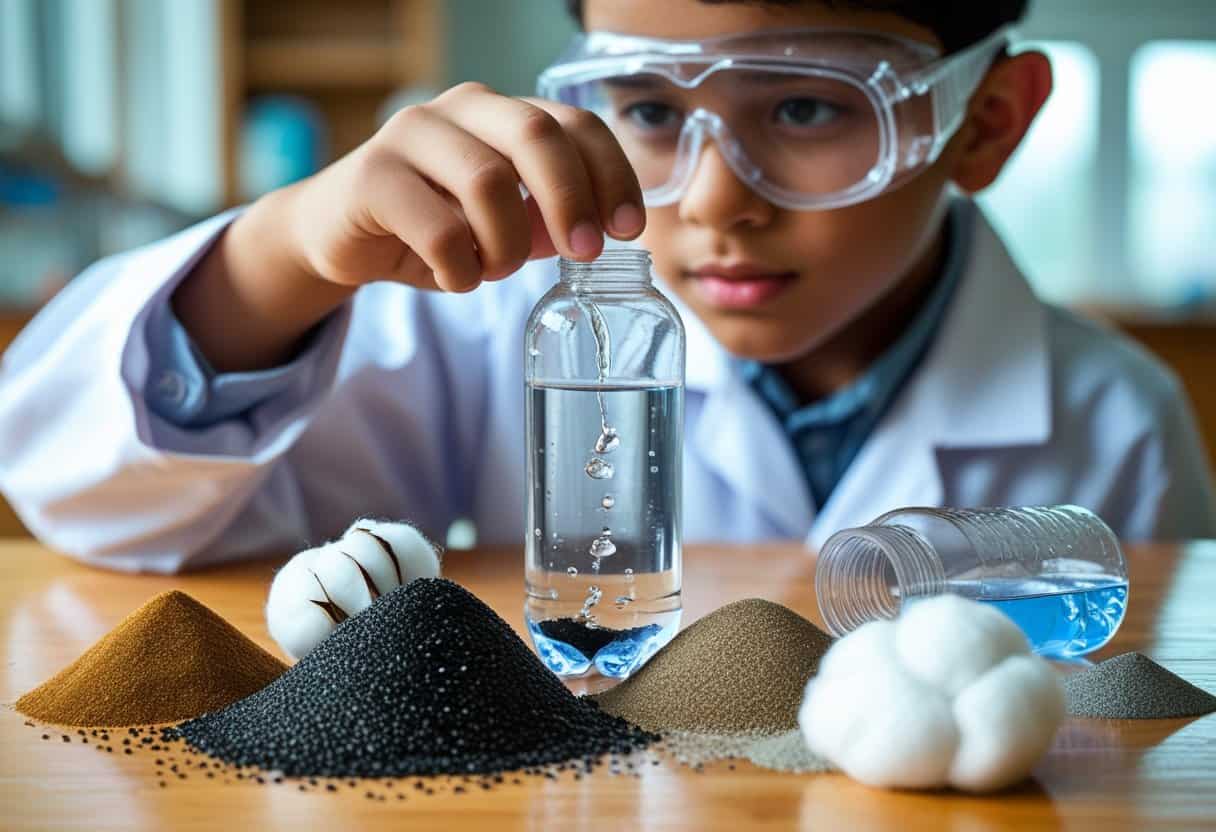
Building effective water filters takes specific materials that work together to remove dirt, particles, and impurities. The main components include activated charcoal for removing chemicals and odors, sand and gravel for filtration, and containers like bottles with cloth or cotton for structure.
Charcoal and Activated Charcoal
Activated charcoal is the most important part of homemade water filter systems. This material removes chemicals, bad tastes, and odors from water by adsorption.
Regular charcoal works, but activated charcoal does a much better job. The activation process creates tiny pores that trap more contaminants.
Students can use charcoal from camping or pet supply stores. Aquarium charcoal works well for science projects.
The charcoal should be crushed into small pieces, but not powder. Important safety note: Never use charcoal from barbecue grills or fire pits—those contain chemicals that make water unsafe.
The charcoal layer should be about 2-3 inches thick. More charcoal means better filtration, but slower water flow.
Sand and Gravel Layers
Sand and gravel create the physical filtration layers that remove visible particles and debris. These materials trap dirt as water passes through.
Gravel goes at the bottom of the filter. It catches large particles and supports other layers.
Use clean gravel about the size of small marbles. Sand forms the middle layer.
Fine sand works better than coarse sand for removing small particles. The sand layer should be 3-4 inches thick.
Layer order from top to bottom:
- Cotton or cloth (top)
- Fine sand
- Coarse sand
- Small gravel
- Large gravel (bottom)
Clean all sand and gravel before using. Rinse them with water until the water runs clear.
Using Bottles, Cloth, and Cotton
Plastic bottles are surprisingly handy for student water filter projects. Most DIY water filters use common materials like water bottles, mason jars, and whatever’s lying around at home.
Cut the bottom off a 2-liter plastic bottle. Flip it upside down so it forms a funnel, with the bottle cap acting as the water outlet.
Cotton balls or cloth work as the first filtration layer. They grab big chunks of dirt and debris before water hits the next layers.
Coffee filters make a solid top layer. They catch particles that cotton might miss. Cheese cloth or any clean fabric can do the trick too.
Container options include:
- 2-liter soda bottles
- Large water bottles
- Mason jars
- Plastic cups
Poke a bunch of tiny holes in the bottle cap to let water drip out slowly. Several small holes are way better than one big one.
Step-By-Step Guide to Building a Homemade Water Filter
Building a homemade water filter takes a few specific materials and a bit of patience. Students usually test their filters with dirty water and tweak the design as they go.
Preparing and Assembling the Filter
You’ll need some basic stuff to create a water filter that gets rid of visible gunk. The main container should be a clear plastic bottle—20 oz, 1 liter, or 2 liter, whatever you have.
Required Materials:
- Empty plastic bottles (clear is best)
- Sand (fine and coarse)
- Gravel or small rocks
- Coffee filters or cloth
- Cotton balls
- Activated charcoal (if you can get it)
- Scissors
Cut the bottle in half with scissors. Flip the top half upside down and nestle it inside the bottom half, so it looks like a funnel.
Start layering the filter materials inside the inverted top. Go in this order: coffee filter, cotton balls, fine sand, coarse sand, and then gravel on top.
Each layer does something different. The coffee filter grabs the tiny bits, cotton balls soak up oils and some chemicals, sand catches medium stuff, and gravel stops the big pieces.
Don’t pack the layers too tight, or water will barely move through. If you have activated charcoal, stick it between the cotton and sand for a real upgrade.
Buy Filter Materials on Amazon
Testing with Dirty Water and Observing Results
Mix up some dirty water using tap water, soil, leaves, a few bits of debris, and even food coloring if you want to see a dramatic before-and-after. This mess stands in for polluted water.
The testing process is simple—pour the dirty water slowly into the top of the filter, being careful not to mess up your layers.
Filtered water should drip out the bottom into another bottle or cup. Compare the filtered water with the original dirty sample. Look for changes in color, clarity, and floating bits.
What to Observe:
- Color of the water
- How many particles are left
- How fast the water flows
- Overall clarity
Jot down your observations in a notebook. Photos of before and after samples help too. Usually, the filtered water looks a lot better than what you started with.
Don’t stress if some particles remain after the first try. Real water plants use several filters and steps for a reason.
Troubleshooting and Improving Filter Design
It’s common to hit snags when you build water filters from household materials. Sometimes the water barely trickles out, or it still looks murky.
If water moves too slowly, your layers might be packed down too hard. Loosen up the sand or rebuild with a lighter touch. Adding more gravel on top can also speed things up.
Still getting dirty water? Try adding extra coffee filters or more cotton balls. Activated charcoal can really help clear things up.
Common Solutions:
- Cloudy water: Add more fine sand or coffee filters
- Slow flow: Loosen up the materials or poke extra holes
- Still dirty: Use an activated charcoal layer
- Particles getting through: Swap out the bottom coffee filter
Test your new and improved filter with a fresh batch of dirty water. Compare results and see what works best. This is how real engineers figure things out—trial and error, and a little stubbornness.
Educational Benefits for Science and Engineering Students

Building homemade water filters lets students get their hands dirty while learning chemistry and physics. It’s a great way to build engineering skills and teamwork, all in one messy project.
Hands-On Application of Theoretical Concepts
Water filtration projects make classroom theory real. Students actually see chemistry concepts like adsorption and physical separation as they stack up the filter layers.
The filtering process shows physics in action—gravity, pressure, and how big or small particles get trapped. It’s pretty cool to watch.
Science experiments can really spark interest by mixing physics, chemistry, and engineering all together.
Students test materials like sand, gravel, and cotton to see how porosity and permeability affect water flow and clarity.
Math sneaks in too as students measure, calculate rates, and maybe even figure out efficiency percentages.
Real-World Problem Solving and Innovation
Water filtration projects connect students to big environmental challenges. They learn that many people live with polluted water that’s unsafe to drink or bathe in.
Students get a taste of what civil, environmental, and materials engineers do when they design water purification systems. It’s a lot more complicated than it looks.
The design process is a balancing act—students have to think about efficiency, cost, and what’s actually available.
These projects also introduce environmental science ideas, like where water pollution comes from and how it’s treated. Human activity really does a number on water quality.
There’s room for creativity too. Students can test weird or unconventional materials and layer combos to see what works best.
Collaboration and Communication in Group Experiments
Building a filter as a team teaches real collaboration. Everyone needs to pitch in, share supplies, and figure out who does what.
Good communication is key when discussing designs or troubleshooting. Explaining the science behind each choice helps everyone get on the same page.
Teams have to document what they did and what happened. Data tables, graphs, and even a quick sketch go a long way.
Not everyone will agree, so compromise and negotiation are part of the process. That’s just real life, right?
Presenting results in front of the class builds confidence and gives students a chance to defend their ideas and explain their reasoning.
Critical Thinking Through Experimentation
Students start by guessing which materials will work best and why. They learn to base predictions on science, not just gut feelings.
Experimenting teaches them to change one thing at a time and see what happens. It’s all about controlling variables and being systematic.
Comparing results from different filters helps students spot patterns and draw real conclusions about what works and what doesn’t.
Sometimes results are weird, and that’s okay. It makes students question their process and look for other explanations.
Trying, failing, and tweaking the design builds persistence. It’s a cycle of improvement that teaches resilience.
Broader Impacts and Future Applications
Water filtration projects open students’ eyes to real-world issues that build resilience and skills they’ll use for years. These hands-on activities teach project management and make classroom lessons personal and might even inspire some future engineers or scientists.
Connecting Water Filtration to Global Challenges
Did you know 2.2 billion people worldwide don’t have safe drinking water at home? Suddenly, these filter experiments seem a lot more important.
Water filtration experiments show how physical and chemical processes can make a real difference. Access to clean water is a huge global issue, and science is part of the solution.
Students can check out how their simple filters stack up against the huge treatment plants cities use. The basic principles are the same, just on a much bigger scale.
Natural disasters make clean water even more critical. Homemade filters offer a glimpse into how engineers design emergency water systems for disaster relief.
Key global connections:
- Water scarcity in developing countries
- Emergency response after hurricanes or earthquakes
- Community health and disease prevention
- International development projects
Sustainable and Eco-Friendly Innovations
Students realize that filter materials like sand, gravel, and charcoal come from nature. It’s a lesson in using renewable resources instead of pricey, manufactured stuff.
Activated charcoal naturally pulls chemicals and bad tastes out of water. Cotton and paper towels prove that even simple materials can filter out dirt and particles.
Reusing plastic bottles and containers for filters ties water treatment to recycling and cutting down on waste. It’s a nice bonus.
Sustainable materials students explore:
- Sand and gravel from local sources
- Activated charcoal from coconut shells
- Cotton fabric and coffee filters
- Recycled plastic containers
Students test how long their filters last before needing a refresh. They can even compare their homemade designs to store-bought filters and see how the costs stack up.
Encouraging Lifelong Interest in STEM Fields
Science experiments have powerful potential and benefits to spark the minds of future scientists and engineers. Water filter projects blend physics, chemistry, and engineering into one hands-on adventure.
Students dive into data and scientific methods as they experiment with different filter designs. They measure water clarity and test pH levels, comparing results between various materials and setups.
STEM skills students develop:
- Hypothesis formation and testing procedures
- Data collection and analysis techniques
- Engineering design and problem-solving methods
- Scientific communication through lab reports
Curious about trying this at home or in class? Here are some supplies you might find handy:
After working on water filter projects, lots of students get hooked on environmental science topics. Some start thinking about careers in environmental engineering, water quality, or even sustainable tech.
Teachers say students often want to build more advanced filters or dig into new water treatment ideas. That kind of curiosity sometimes leads to science fair projects or just deeper dives into chemistry and environmental protection. Isn’t that what real learning is all about?
Parents and teachers can find ready-made water filter kits on Amazon that save time and include all the materials. These kits make it easy to jump right into the project.
The Water Filter DIY Kit for Kids gives students everything they need to build a working water filter. This hands-on STEM kit lets kids actually see how water filtration works.
Another good option is the 4M Green Science Clean Water Science Kit. It covers both filtration and desalination, which is surprisingly fun to watch in action.
Amazon has a bunch of other water filter kits that are worth checking out:
- Playz Science Water Filtration Kit
- National Geographic Science Magic Kit
- 4M Kidzlabs Crystal Growing Science Kit
- Scientific Explorer Disgusting Science Kit
Most Amazon kits come with step-by-step guides. Kids don’t have to measure or guess; everything’s ready to go.
These kits work for classrooms, homeschoolers, or science fair projects. You won’t have to hunt down random supplies, and the quality’s usually decent.
Amazon offers a wide range of prices and difficulty levels. Basic kits can be as low as $15-$25, while fancier sets with more experiments might go for $30-$50.
Teachers sometimes grab these in bulk for classroom use. It’s a relief not having to prep everything from scratch, honestly.


